So, you're eyeing your yard, maybe dreaming of a brand-new concrete sidewalk, or perhaps you're just fed up with that old, crumbling one. Good for you! A solid sidewalk isn't just nice to look at; it really boosts your property's value and makes things safer. But hold on before you grab that shovel. Let's chat about what goes into it, what you might tackle yourself, and when it's definitely time to pick up the phone.
Before You Even Think About Digging: Planning & Permits
Okay, first things first: planning. This part? Totally doable on your own. Start by picturing where you want this sidewalk to go. Is it connecting your driveway to the front door? Maybe leading out to a shed? How wide should it be? Most residential sidewalks are somewhere between 3 and 4 feet wide. Try to pick the easiest route, steering clear of big tree roots if you can. Trust me, those roots are a nightmare for concrete down the road.
Next up, utilities. This is super important. Before you dig even an inch, call 811. It's free, and they'll send someone out to mark all the underground lines—gas, water, electric, cable. You absolutely do NOT want to hit one of those. Seriously, don't skip this step. It's legally required and, more importantly, a huge safety measure.
Permits. Things get a little fuzzy here. If your sidewalk stays entirely on your private property and doesn't connect to a city sidewalk or public right-of-way, you might not need a permit from the city of Billings. But if it ties into public property, or if you're doing any big grading or drainage work, you probably will. It's always smart to double-check with the City of Billings Planning Department. A quick call can save you a ton of headaches and potential fines later on. This is something you can definitely handle yourself, but please, don't just guess.
The 'Can I Do This Myself?' Stage: Prep Work
Alright, let's get down to the brass tacks. Site preparation is probably the most back-breaking part, and it's often where homeowners decide they're in too deep. You'll need to dig out the area. For a typical sidewalk, you're looking at about 6 to 8 inches deep. That gives you room for a 4-inch gravel base and a 4-inch concrete slab. If you're only doing a short path, say 10-15 feet, you might manage with a good shovel and a wheelbarrow. For anything longer, or if you've got really tough soil (like some of that dense clay we often see around the Heights), renting a small skid steer or an excavator for a day could be money well spent. It'll save your back and a whole lot of time.
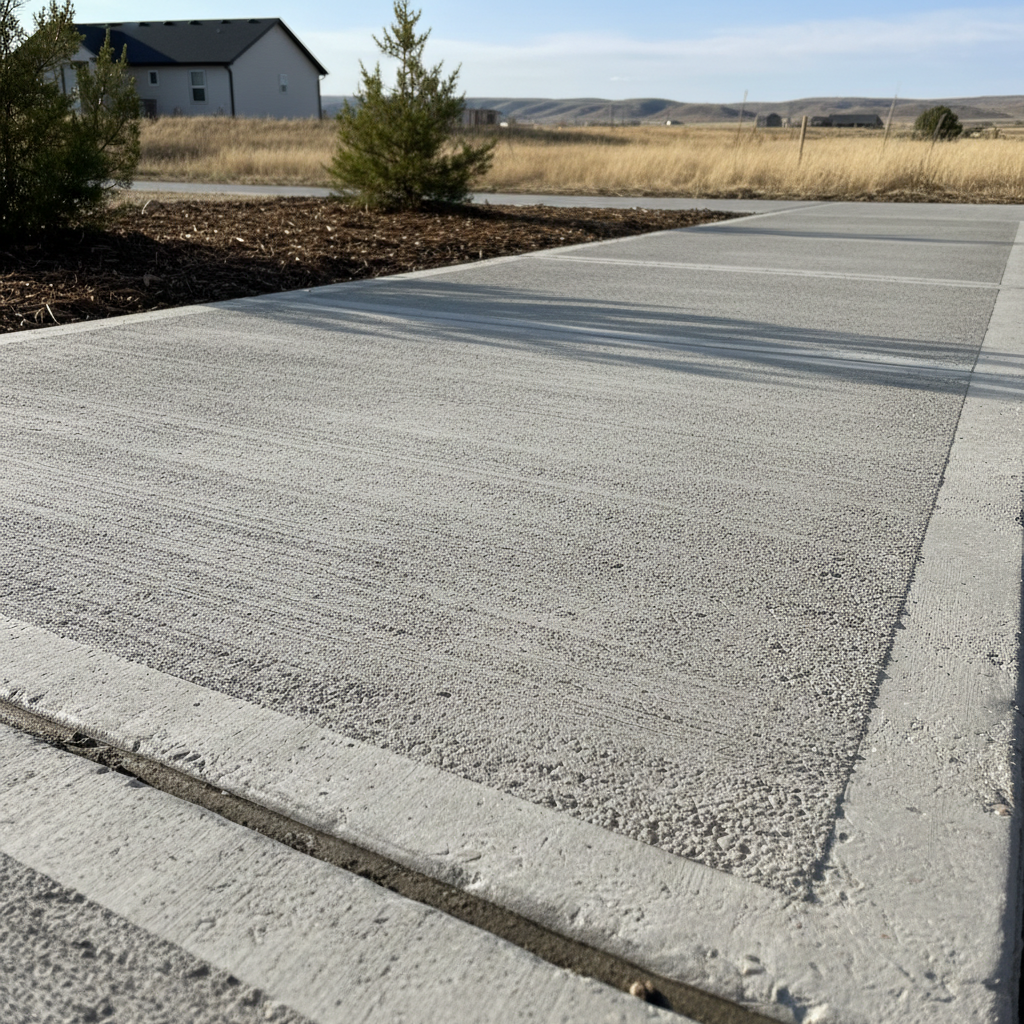
Once you've dug it out, you need to lay down and compact your gravel base. This is crucial for drainage and stopping cracks later on, especially with our Montana freeze-thaw cycles. You can rent a plate compactor—they're not too tricky to operate. After that, you'll build your forms. These are usually made from 2x4s or 2x6s, depending on how thick you want the slab. You'll stake them in securely to keep the concrete in place. Getting these forms perfectly level and straight is key. If your forms are off, well, your sidewalk will be off. This is a DIY-friendly job if you're comfortable with a tape measure, a level, and a hammer.
Pouring the Concrete: When to Call Top Line Concrete
Now for the actual pour. This is where I usually tell homeowners to seriously think about bringing in the pros. Pouring concrete, even for a sidewalk, isn't just about dumping it from a truck. It's a race against the clock and a skill that takes real practice. You have to spread it evenly, screed it (that means leveling it off), float it, and then finish it—all before it starts to harden. If you're doing a tiny, super short path and mixing bags of concrete yourself, you might pull it off. But for anything that needs a concrete truck, you're talking about cubic yards of material that sets fast. You'll need several people who know what they're doing, plus specialized tools like bull floats and edgers.
If you don't get the finish right, you'll end up with a rough, uneven, or even dangerously slick surface. Plus, you need to understand control joints—those cuts you see in sidewalks. They're not just for looks; they help manage cracking. Knowing exactly where and when to put them in is vital. This is where Top Line Concrete truly shines. We've got the crew, the equipment, and the experience to give you a smooth, long-lasting finish that will stand up for decades, handling everything from the pour itself to the proper curing.
After the Pour: Curing & Care
Whether you poured it yourself or hired us, proper curing is absolutely essential. This means keeping the concrete moist for at least 5-7 days, sometimes longer depending on the weather. You can do this by covering it with plastic sheeting, using wet burlap, or applying a curing compound. Don't let it dry out too quickly, especially in our dry Billings climate. Fast drying leads to weaker concrete and more surface cracks, you know?
And here's a big one: stay off it! Give it at least 24-48 hours for foot traffic, and a week or more for anything heavy like a wheelbarrow. The longer you let it cure without disturbance, the stronger it will become.
So, can you build your own concrete sidewalk? For the planning, checking permits (not necessarily getting them), excavation, and formwork on a smaller project, absolutely. But when that concrete truck pulls up, or if you're tackling anything more than a very short, simple path, that's when you call in the experts. We're here to make sure your sidewalk is built right, the first time.